
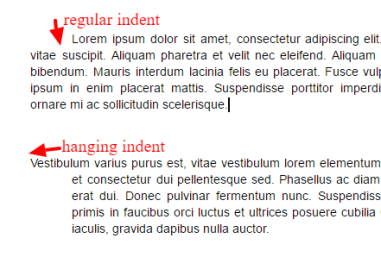
An official Works Cited or Bibliography page has very strict formatting guidelines. One of the main features is what is called a “hanging indent,” which is when the first line of a paragraph sticks out to the left of the rest of the paragraph.
There are right ways and wrong ways to create hanging indents. The right way is easy, and this tutorial will show you how. The wrong way is time consuming, annoying, and doesn’t always work well.
One of the wrong ways is to use the TAB key. This almost never works well. These instructions show you the right way to format your citations while never using TAB.
| Note: Proper formatting calls for the document to be double-spaced. In my examples below, I’m skipping the double-spacing until the end, so my screenshots fit nicely. However, you may double-space it before you start, if you like. |
Step 1.

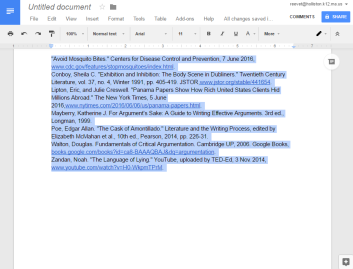
Type your bibliography lines out first, ignoring the indentation.
It is way easier if you type first and format the indenting afterwards.
Step 2.
Select all of the citation paragraphs.
Step 3.
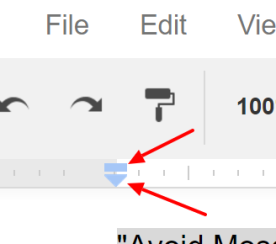
Find the tiny blue markers on the left-hand edge of the ruler.
Important: There are two separate markers, really close to each other: a little blue rectangle on top and a little blue triangle on bottom.
Found them? OK, follow the next steps carefully.
Step 4.
Click and drag the lower triangle to the right by half an inch.
The rectangle always moves with it: that’s OK for now.
The blue triangle sets the left edge of your paragraphs.
Step 5.

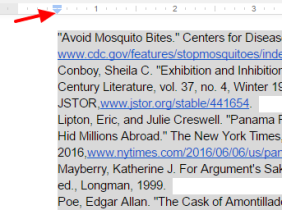
Carefully drag the tiny blue rectangle to the left by half an inch (back to where it started).
The triangle should not be moving along with it.
The blue rectangle sets where the first line of the each paragraph should start.
| Understanding What You Did
By moving the markers, first you set the left edges (with the triangle) and then you set an “except for the first line” rule (with the rectangle). Rectangle = first line of paragraph Triangle = all other lines of paragraph How did the document know where to start a new paragraph? New paragraphs started wherever you had hit the Enter key. |
If all you need are citations, then you’re done! If you need annotations, too, then go on to the next steps.
Adding Annotations.
For some assignments, you need to add annotations (descriptive sentences) below each citation. Follow the directions below for the easy way to add these sentences.
Step 6.
Click your cursor at the end of the citation.

Watch me do it WRONG. Don’t do this: If I click Enter at this point, it will start a new paragraph, and indent it exactly like a citation. Just to be clear: THIS IS WRONG.

Instead, do it the RIGHT way, like in the next step.
PAGE_BREAK: PageBreak
Step 7.
With your cursor at the end of the citation, hit SHIFT-ENTER, and then type your sentences.

SHIFT-ENTER means “start the next sentences on a new line, but still in the same paragraph.” See how this is important? First lines are set by the blue rectangle to give a hanging indent. We don’t want the hanging indent on the annotation sentences.
Repeat this process for all of your annotations.
Step 8.

If you haven’t already, remember to double-space your document.
